When you insert an image onto the stage or click on an image that has already been added to the message, the properties area of the editor will show you a number of settings that you can configure and tools that you can use.
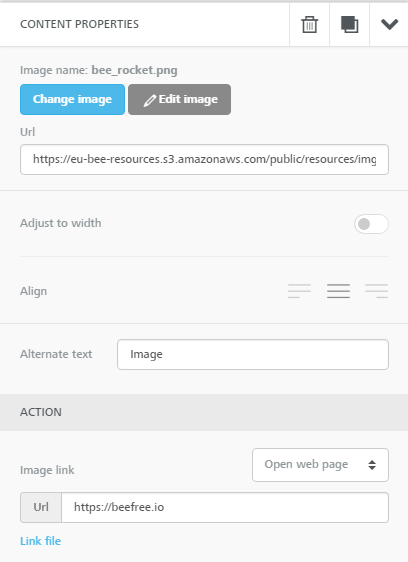
- Change image: click on this button to replace the image with a new one.
- Edit image: click on this button to load an image editing tool that allows you to resize the image, apply visual effects, and much more.
- URL: specifies where the image is saved. You can also paste an external URL to load an image from there.
- Dynamic: whether this is a dynamic image. Learn more about dynamic images.
- Adjust to width: toggle this setting ON and OFF to automatically fill (ON) or not (OFF) the entire area of the message in which the image was placed.
- Align: change the positioning of the image.
- Alt text: enter the text that should be displayed when images are turned off. This is a best practice in email design since there are still email clients that have images turned off by default.
- Action: you may link the image to a URL, to a new message in an email client or to a telephone number for making a call or sending a text message. You can also link the image to a file that you previously uploaded through the editor’s file manager.